Setting up a Website at WordPress.com
How to Set up a Free Website at WordPress.com
Click on this link to open a new window and start the process

To get started, you need to sign up for an account. On the first screen, you will be asked for a username, password, and email address. You must agree to the terms of service, and also select whether you would like a blog URL such as MYBLOGNAME.wordpress.com created or if you want to setup a username-only account. Since you are setting up a website you DO NOT choose username-only account.
STEP 1: Sign Up

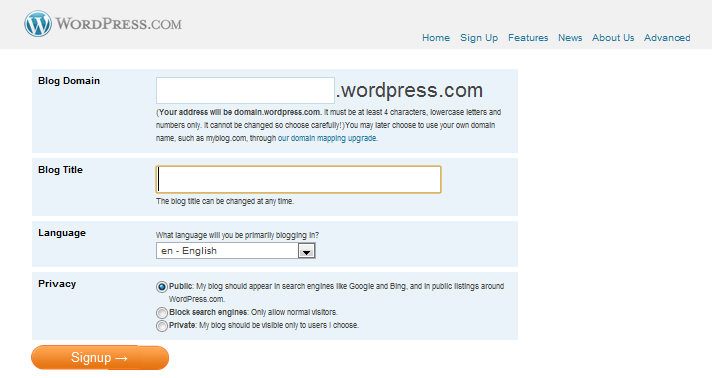
If you choose to create a blog when you sign up, you will be able to choose the blog domain (or blog URL) on the second screen in the sign up process. You cannot change the blog URL once it is created. You’ll also see options to set a blog title, language, and search engine privacy on the second screen. All of those options can be changed in the settings pages later.
Your address will be domain.wordpress.com. It must be at least 4 characters, letters and numbers only. It cannot be changed so choose carefully!
STEP 2: Activate

After you click the Signup button, you will see a page with some additional profile settings. You can add those settings right away or you can change them any time from your profile page later.
Next, check your email for your activation link and click on the link to activate your new account. If you don’t receive the email right away, just contact support so they can send you the activation link again.
STEP 3: Login to your new WordPress site
Once you have activated your WordPress.com account, you should login to WordPress.com using the login form at the top left of the http://wordpress.com/ home page. After you login, you’ll see a gray admin bar along the top of all WordPress.com web pages. The admin bar has quick links for getting to your account pages, blog dashboard, creating a new post, and more. Click on the My Dashboard link to get to the settings and editing pages for your new blog.

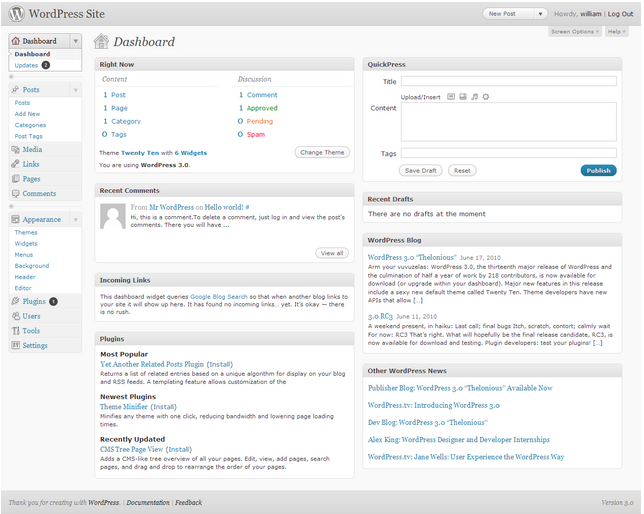
The Dashboard is the first screen you see when you log into the administration area of your blog. The main idea of the dashboard is to give you a place where you can get an at-a-glance overview of what’s happening with your blog. You can catch up on news, view your draft posts, see who’s linking to you or how popular your content’s been, quickly put out a no-frills post, or check out and moderate your latest comments. It’s like a bird’s eye view of operations, from which you can swoop down into the particular details.

