How to Get BlueHost Web Hosting
Lets get your website launched now!
There are 2 steps to this process:
Step 1 is to sign up for web hosting and Step 2 is to install the state of the art software, WordPress.
We will make this very easy for you as we will provide step by step easy to use instructions to do both!
Once you sign up for hosting you can go to the link at the bottom of this page to install your website software, WordPress, in 10 minutes or less!
We have provided simple and easy to use instructions to help you complete the hosting sign up process. We will also provide another set of instructions for you to set up your website once you finish your hosting set up.
Step 1: Open the Sign up Screen
The link below will open in a new window so that you can follow these directions at the same time you are signing up.
Please click on this link now: Sign up for Web Hosting
Step 2: Sign up Now page
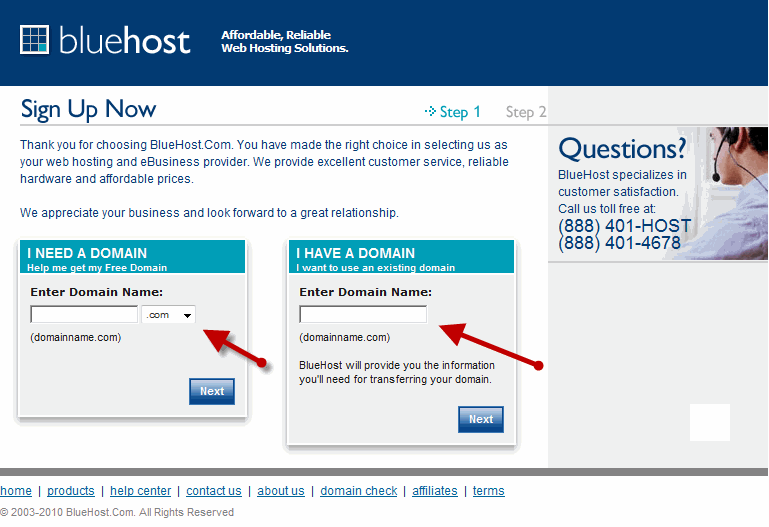
When you sign up for web hosting you will need to tell the host the domain name ( ie: http://www.BuildMySiteforFree.com) you want to use for the site. Many people already have a domain name that they registered previously or have currently hosted somewhere else. If this is the case then you should put that name in the “I have a domain” box.
If you have not already registered a domain name and need to purchase one you can do so here. As a hosting client your first domain name will be FREE. Domain registrars normally charge as much as $35 per year for you to register a domain, however at our host your first domain registration fee is FREE.
Insert the desired domain name in the box labeled “I need a domain”. If your choice is available the host will take care of the registration for you. If it is not available you will need to keep trying until you find one that is.
What if I choose a Domain Name now that I want to change later?
No problem! Our host offers UNLIMITED domains, so if you choose a name now that want to change you can just register another name and switch your website to the new name.
Step 3: Enter Billing Information
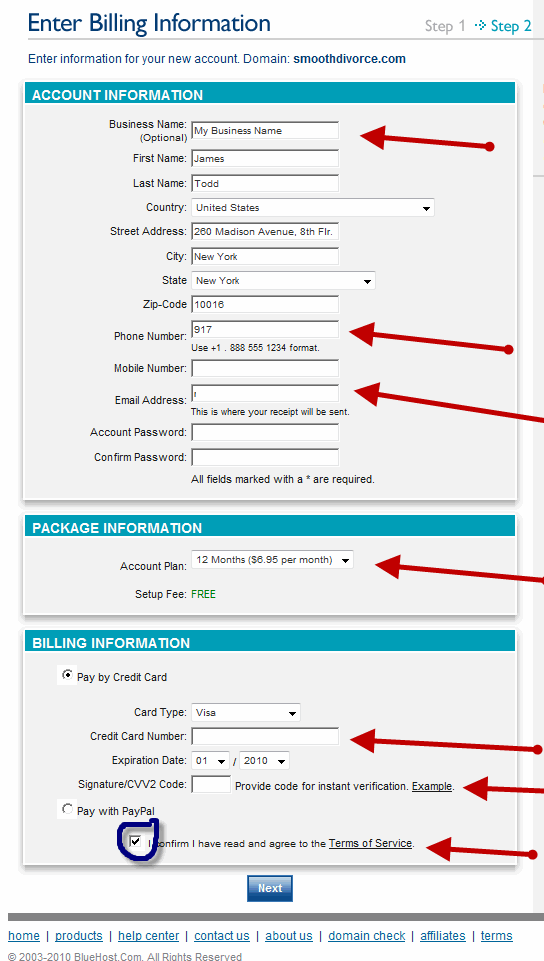
Now that you have entered your domain name, the next step is to provide the billing information. If you have a business name, enter it, however this is not required.
Please enter all the requested info, name, address, city, state, zip.
Please make sure you use an email address that you check regularly. Your email information is so that they can contact you with problems. It is not for promotion.
Make sure you use a phone number that the hosting company can reach you on. The company prides itself in top quality customer service and calls everyone that signs up within 24 hours to answer any questions you have or address any issues you may have.
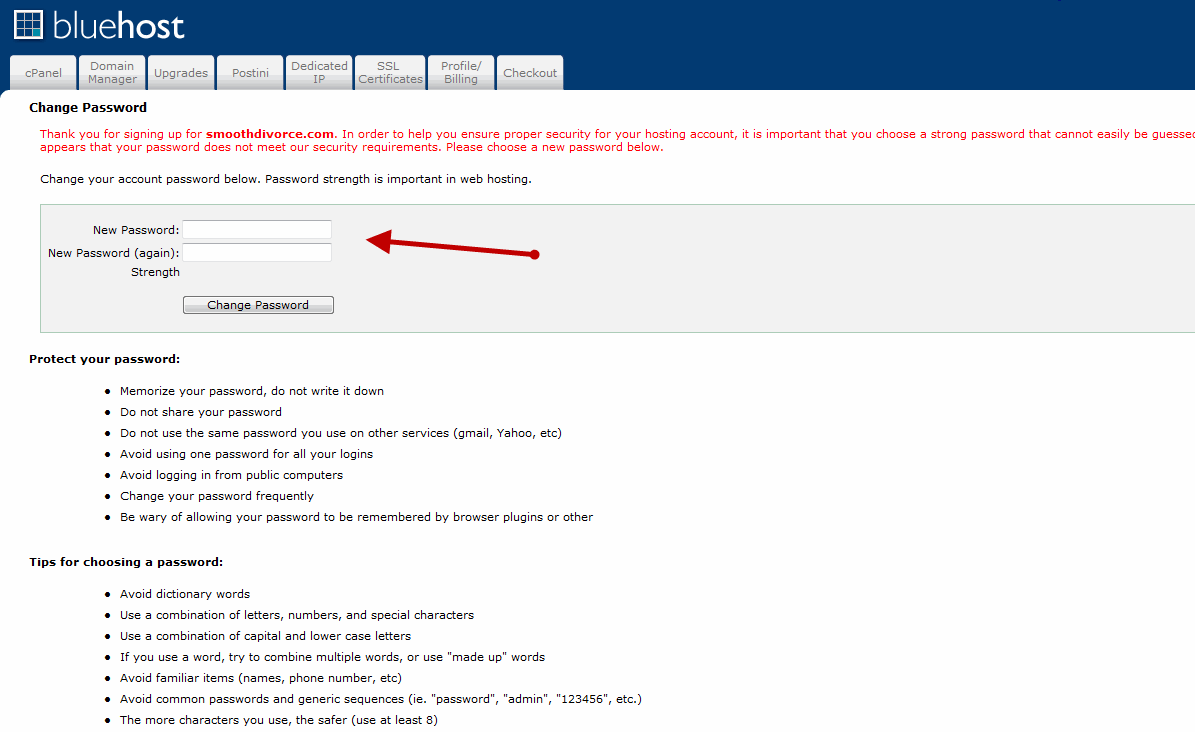
IMPORTANT: Password Strength: You will need to create a password that combines upper and lowercase letters, characters (like @) and numbers.
If you do not create a strong enough password they system will prompt you later on to update it.
Don’t forget to write down the domain name and password you just created! You will sign in using your domain name and password.
Now complete the rest of the form by inputting your credit card. Make sure you check the “I confirm…” section at the bottom for the “terms of service”.
Then click “next”
Step 4: Welcome to Bluehost!
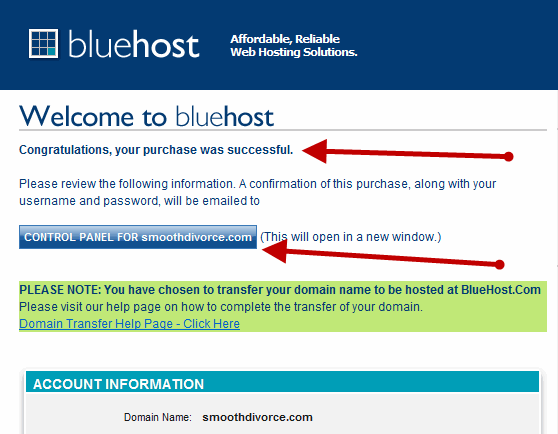
Congratulations, your purchase was successful! If for some reason your order does not go through you may need to try again or use another credit card. If you continue to have problems there is a phone number for you to use to seek assistance.
Please review this page to make sure all your information is correct. You should print this page for your records.
Now, at the top of the page, click on the “Control Panel for yourdomain.com” button.
In the event the password you created is not considered strong enough by the host you will be prompted to change it on a page like this one.
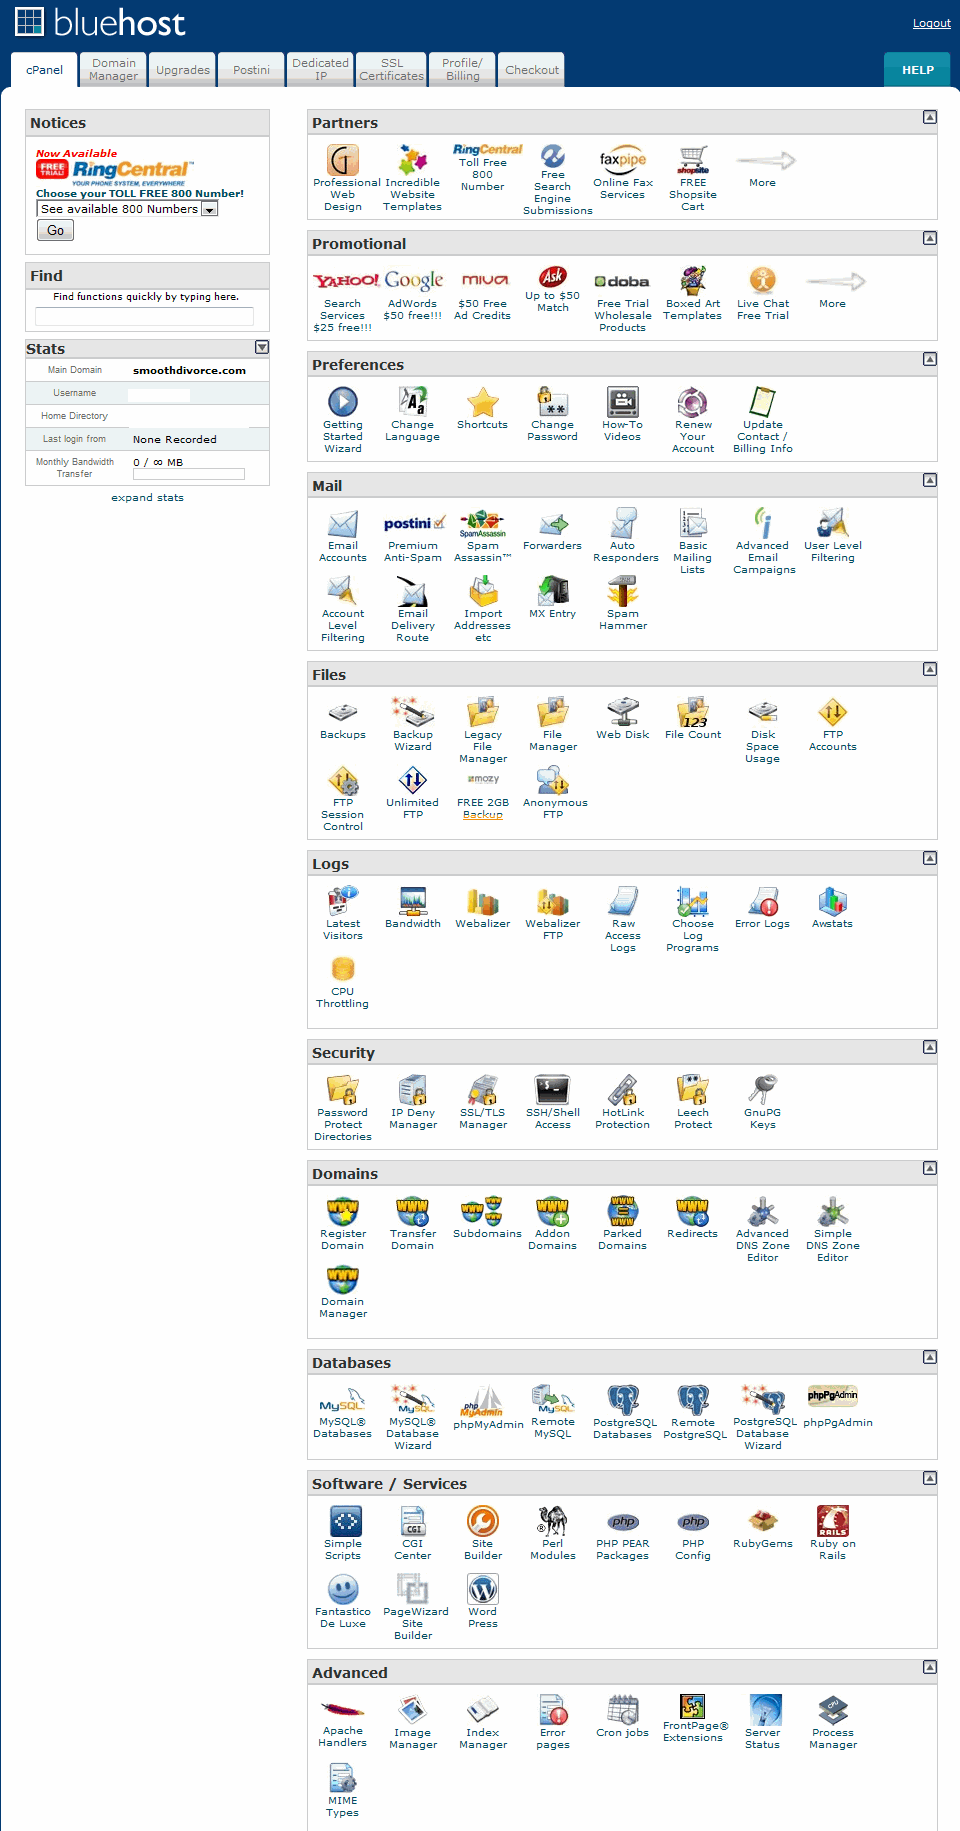
Step 5: The Control Panel
You will need to sign in using your domain name and password you created earlier.
NOTE: If you were required to update your password and you try to log in and it doesn’t work then use your original password and it will ask you to change it again once signed in.
This is the fun part! You’re now on the main page for your administrative access in your hosting account.
Review this page as it presents links to all the products, software and services available to you as a web hosting client.
Note the Promotional section, 2nd from the top, this is where you can access the free advertising coupons provided as part of your sign up incentives.
A great resource to learn about all the offerings on this page as well as extensive videos and tutorials is at the BlueHost Tutorials.
Step 6: Installing My Free Website Software: WordPress
Click here and we’ll take you to the Wordpress website builder instructions
