How to Install WordPress Plugins
A Plugin is a software program that adds features to your website. These features could include anything from a Contact Me form to the addition of a shopping cart to sell products. There are thousands of Plugins that have been created which can be used with your website.
We have created a directory of the best Plugins we can find right on our website, Build My Site for Free. Plus we have many articles that will teach you how to use the best Plugins for specific applications like adding Social Media to your website.
Visit our WordPress Tips and Tricks category to learn what you need to know to build your web business or blog.
Click here to choose from over 150 mostly free WordPress Plugins.
You can add lots of great features to your website with Plugins.
Feel free to improve your website as often as you like!
Step 1: Sign in to your website
Go to http://www.thedomainnameyouchose.com/wp-admin and sign in with your user name and password.
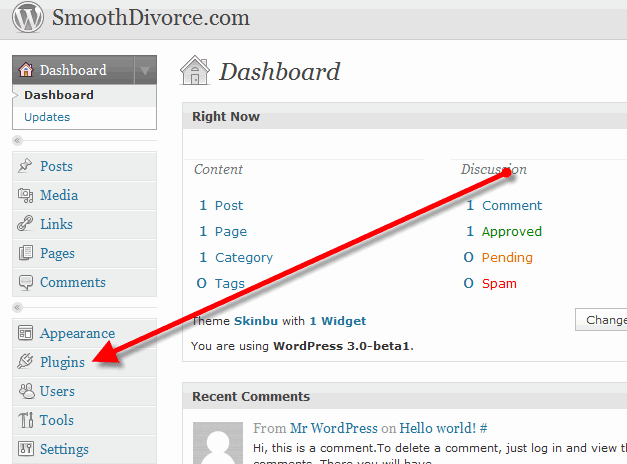
Once signed in you will see your Dashboard. On the left side of the dashboard is a tool bar which controls all the functions of your WordPress website.
Look down the toolbar until you see “Plugins” and click on that link.
Step 2: Manage Plugins
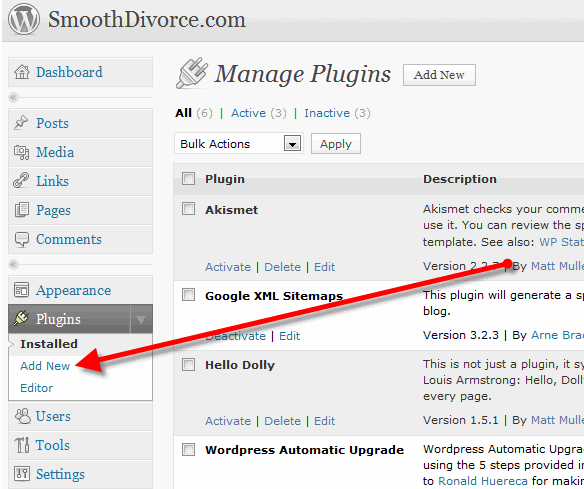
You will now see all the Plugins you have installed in your website.
Now click on “Add New”
Step 3: Choose a Plugin
Leave the “Install Plugins” page open and open a new window in your Internet browser and go to the Plugins directory on Build My Site for Free by clicking on this link.
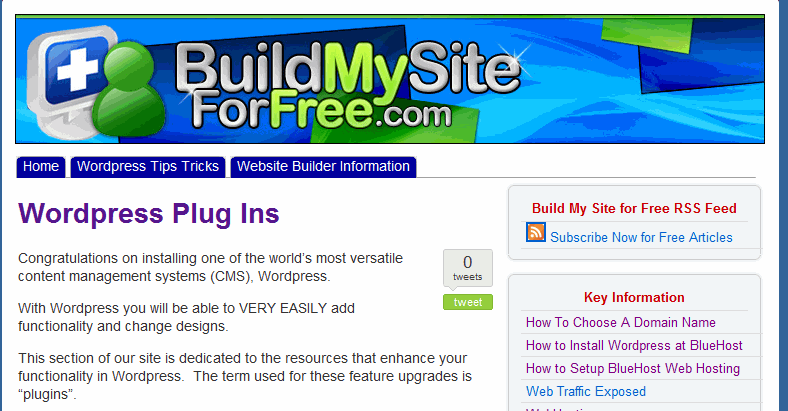
Scroll down the page and choose a Plugin. NOTE that, at the top of the Plugin list, there is a list of categories. Clicking on a category will display all the Plugins in that section.
For purposes of this tutorial, lets choose the “Tools Plugins” category.

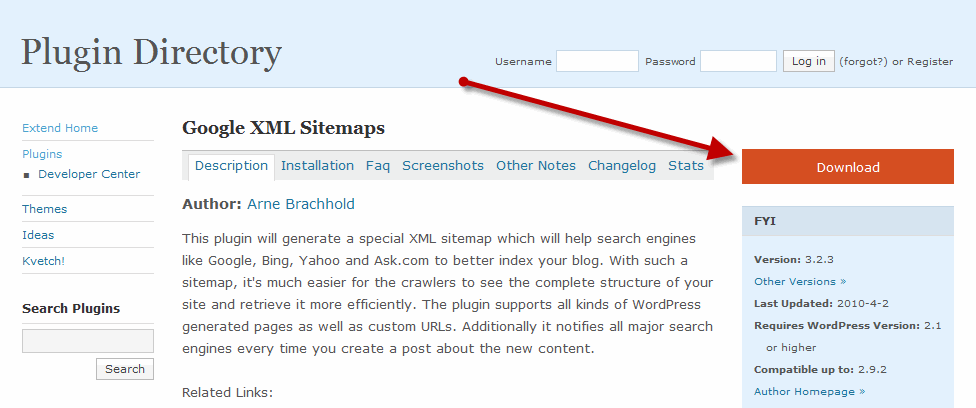
Once you choose the specific Plugin, click on its title and a new window will open where you will see a download link. Download the zip file to your desktop. DO NOT open the zip file. You will install the zip file just as it is.
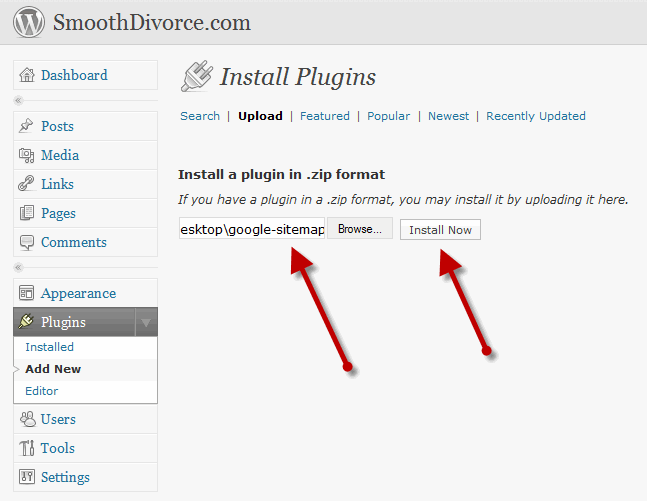
Now go back to the WordPress admin “Manage Plugins” page and click on the“upload” link as noted in the image below. Next click on browse and find the zip file on your desktop that you just downloaded.
Next click “Install Now” and in a few minutes it will be all done.
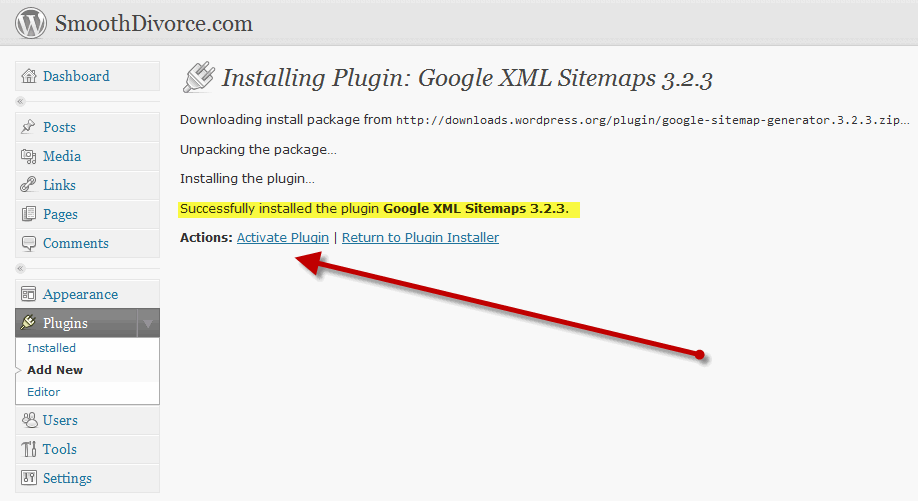
Now click “activate plugin” and you will be taken back to the Manage Plugins page.
Now you will see the XML Sitemaps Plugin on the list of active Plugins.
Here you will see the XML Sitemaps Plugin installed. For most Plugins that is all you need to do. In the case of this Plugin it has a “settings” link which may mean you need provide some information to set up the Plugin to run correctly. At this point you would click on the “settings” link and provide whatever is necessary.
If you are not sure what to do you will also see “FAQ” , support and links to the Plugin creator’s site that you can reference for more information.

Now you are ready start adding great features to your website. NOTE: You don’t want to add more Plugins then you need as you will find yourself constantly upgrading the installed Plugins as each one notifies you of updates. You will know that you need to update a Plugin each time you sign in to WordPress as there is a red “warning” icon by the Plugin link on the toolbar.
So good luck and have fun!
