How to Install WordPress Themes – Step 3
A WordPress “Theme” is the graphic design for your website. There are thousands of themes that have been created which can be used with your website. Our free website builder, WordPress, makes it really easy and quick to install your graphics on your website.
It used to be you had to hire a graphic designer to create your website. This could take weeks and cost thousands of dollars. But with WordPress you can have a theme installed in a matter of minutes. What may take a few minutes extra is finding the desired theme design for your website.
This step consists of 2 parts:
- Part 1: Find a basic free theme and install it
- Part 2: Finalize your desired theme. We will provide a list of directories to search for a graphic theme you like.
A really great advantage of WordPress is that your content (ie: articles, pictures and links) is stored in a database. What this means is that you do not need to re-input any content when you change themes. The system will automatically display the your content according to the design of the new theme.
Feel free to change your themes and look of your site as often as you like!
When this step is done click here for Step 4: Completing your WordPress settings
Step 1: Sign in to your website
Go to http://www.thedomainnameyouchose.com/wp-admin and sign in with your user name and password.
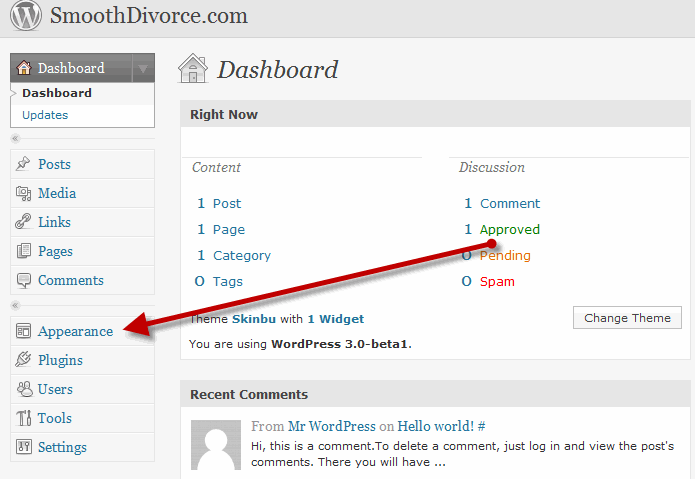
Once signed in you will see your Dashboard. On the left side of the dashboard is a tool bar which controls all the functions of your WordPress website.
Look down the toolbar until you see “Appearance” and click on that link.
Step 2: Manage Themes
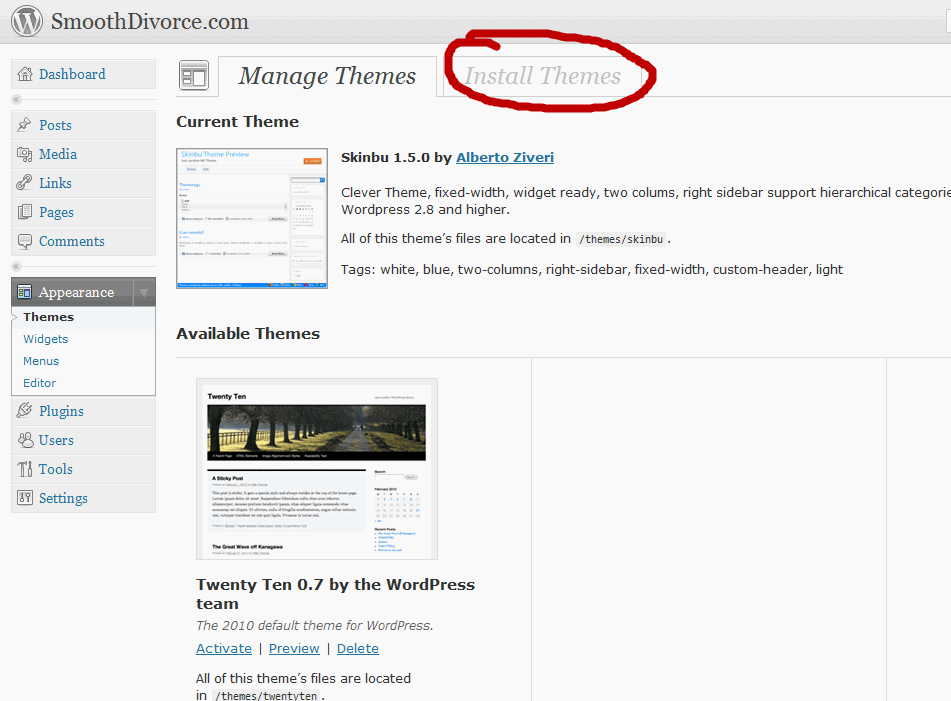
You will now see all the themes you have installed in your website.
Now click on “Install Themes”
Step 3: Choose a Theme
Leave the “Install Themes” page open and open a new window in your Internet browser and go to the Themes directory on Build My Site for Free by clicking on this link.
Scroll down the page and choose either a Premium (Paid) or Basic (Free) theme.
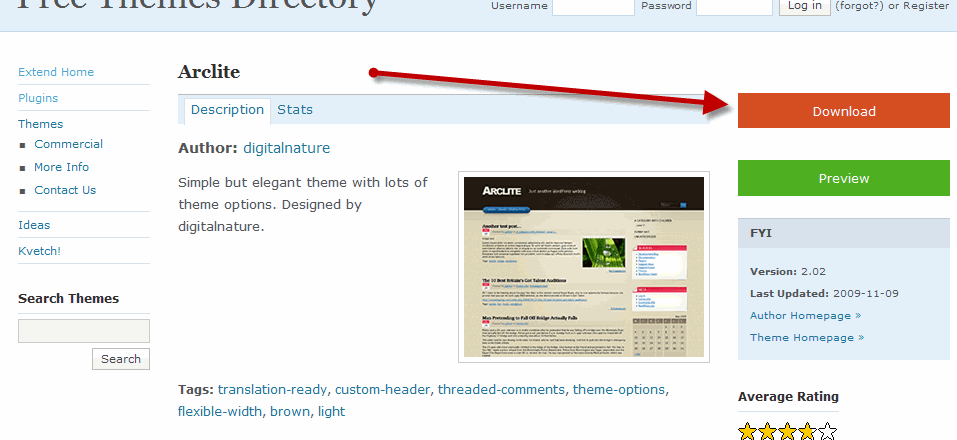
Once you choose the theme click on its title or picture and a new window will open where you will see a download link. Download the zip file to your desktop. DO NOT open the zip file. You will install the zip file just as it is.
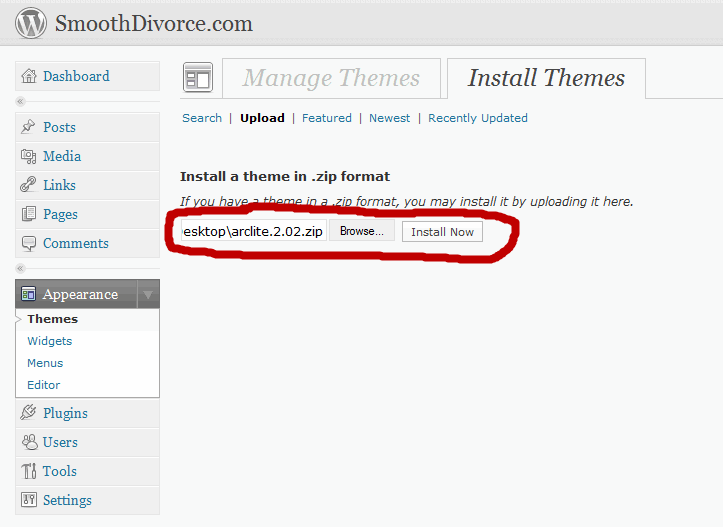
Now go back to the WordPress admin “Install Themes” page and click on the “upload” link as noted in the image below. Next click on browse and find the zip file on your desktop that you just downloaded.
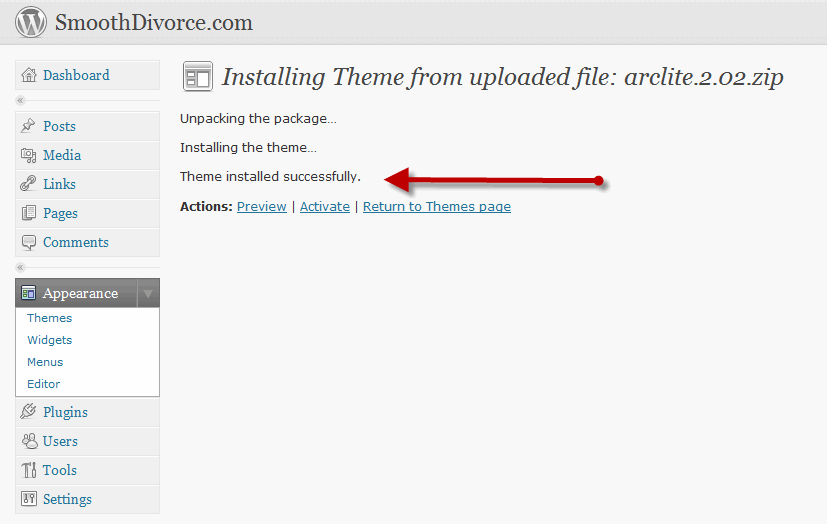
Now click “Install Now” and in a few minutes it will be all done.
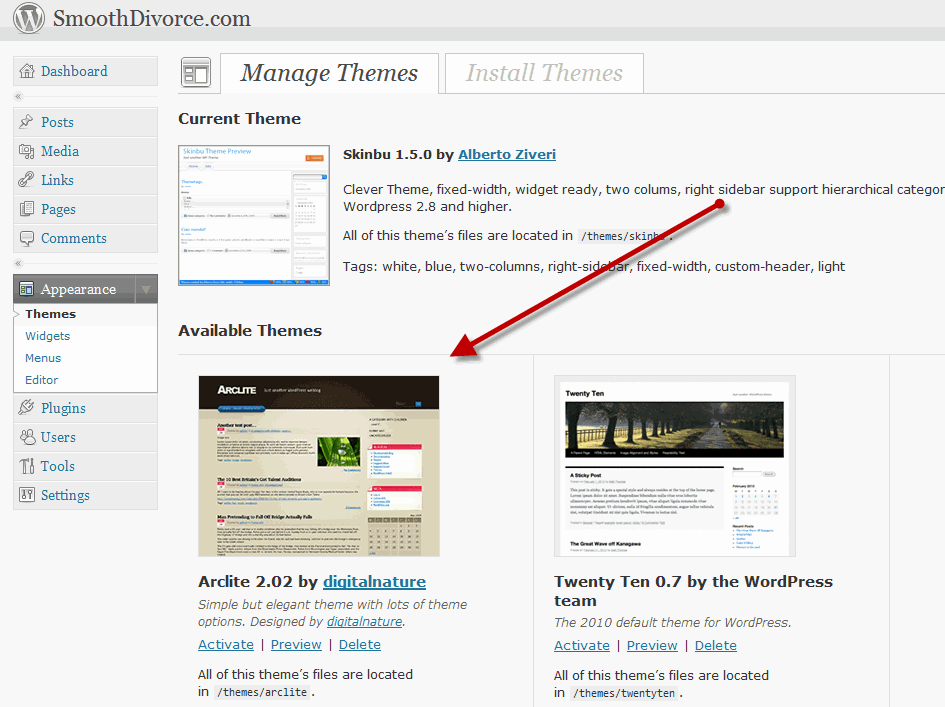
Now click on the Return to Themes page and you will see your theme on the page.
You can choose to activate the theme or just preview it. It’s very easy to activate and deactivate themes. You can do it as often as you like until you find the theme you like the best.
NOTE: All your content (ie: articles, pictures and links) is stored in a database and you do not need to re-input any content when you change themes. The system will automatically display the your content according to the design of the new theme.
If you click on the “preview” button you can see how your website will look if you choose to use the new theme.
Now you are ready to find the theme you like the best and install it.
But wait, first lets go to Step 4 to finish your set up.
Part 2: Finding your Optimum Theme:
We have created a directory of the best themes we can find right on our website, Build My Site for Free.
If you click here you can choose from lots of free and premium WordPress Themes.
So good luck and have fun!

