How to Install WordPress at BlueHost
Congrats on completing your web hosting set up!
In the next 10 minutes we’ll help you launch your web site.
Once you have your site up and running you will want to review how to find and install Themes (website designs) and plugins (website feature add ins). You can visit How to Install WordPress Plugins and How to Install WordPress Themes for that information.
Step 1: Sign into your BlueHost Account
Go to Blue Host and click on the Control Panel login button in the upper right hand corner.
You will see this screen below. You should login using your domain name and password that you just set up.
Step 2: Installing WordPress:
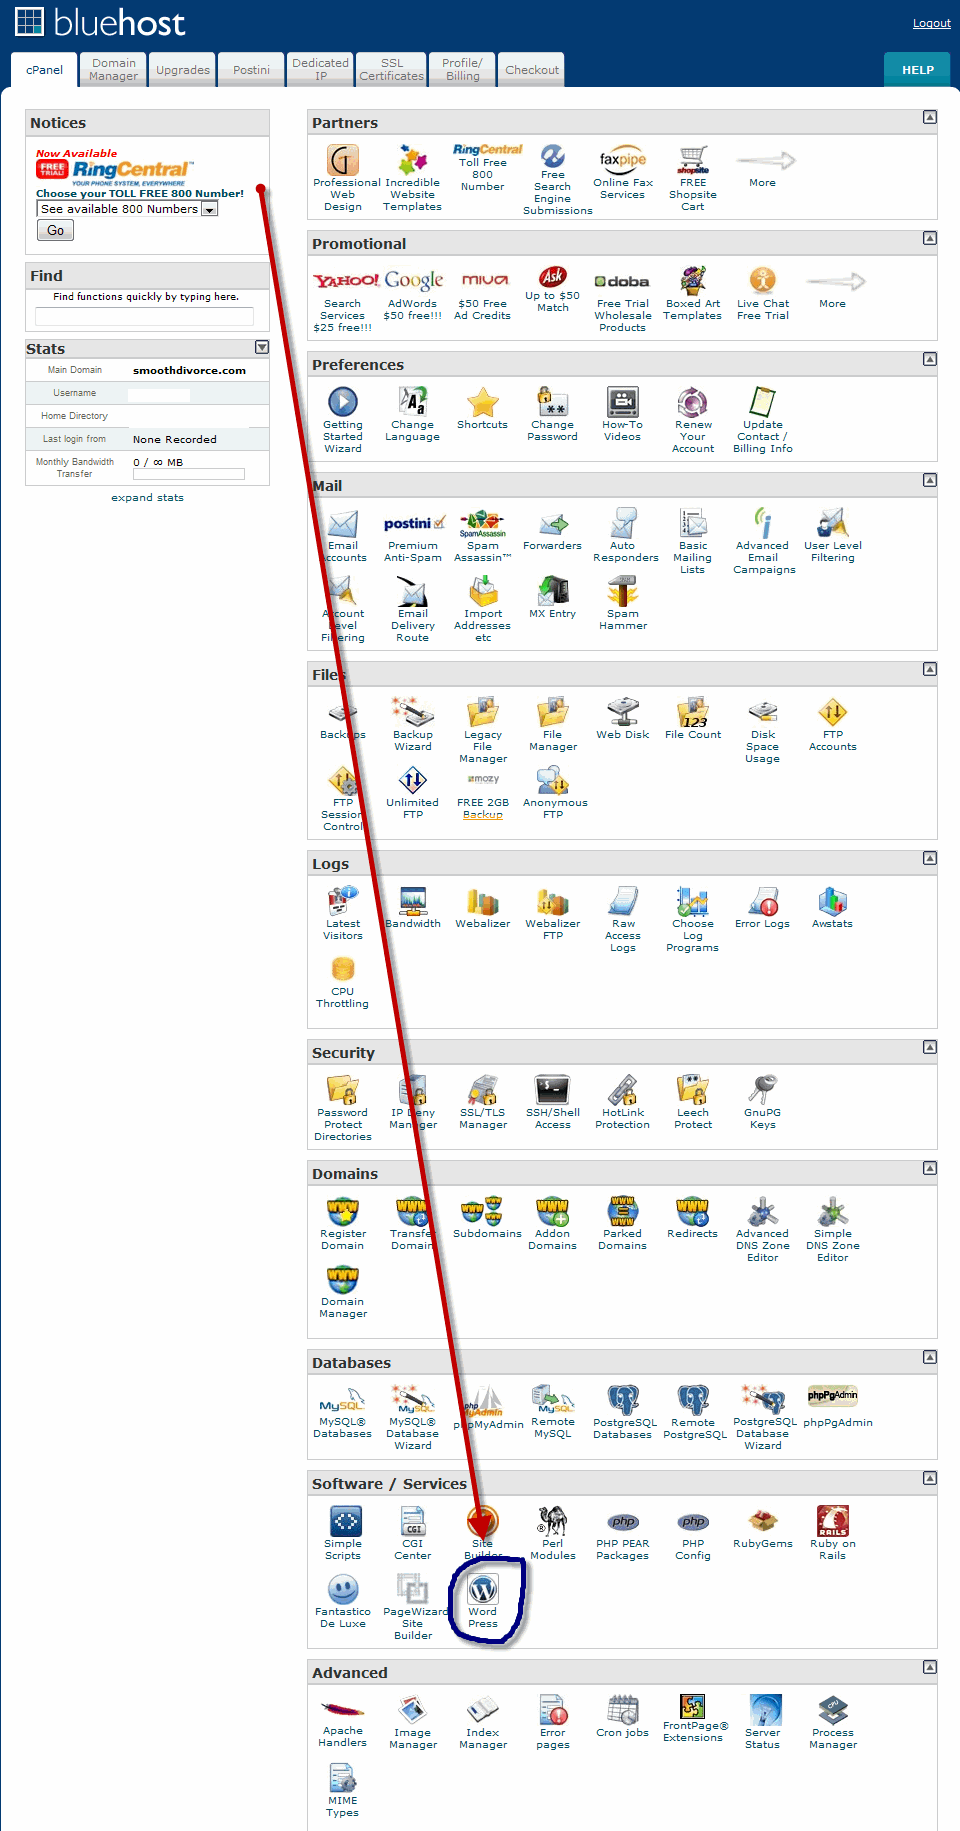
You will now see the control panel screen. Look down the control panel sections until you find the section that says “Software and Services”, the second one from the bottom of the page.
Look in that section for the “Wordpress” name and logo. Now click on the WordPress icon to start the installation process.
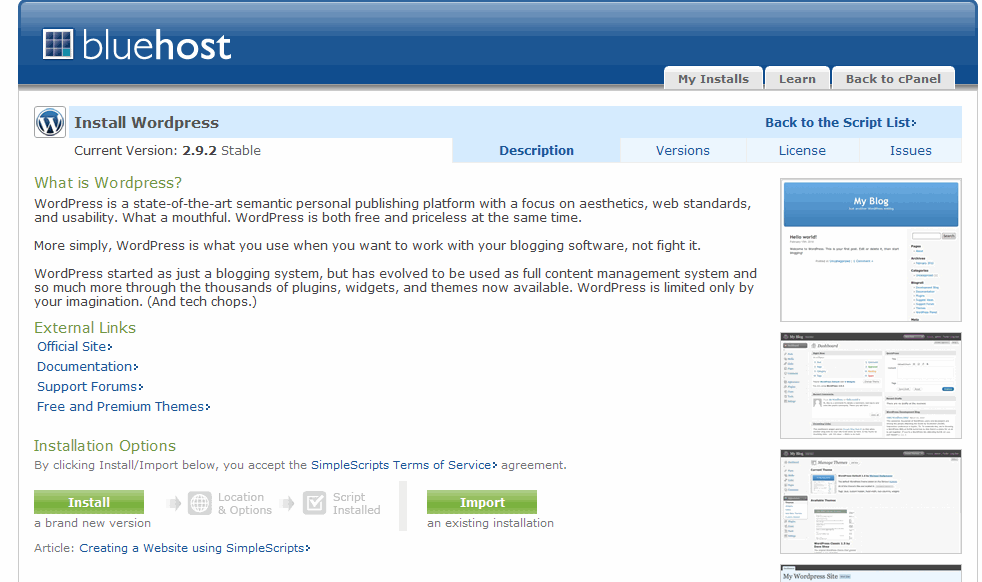
Step 3: Now you see the Install WordPress screen.
If this is the first WordPress website you are creating click on the Install button on the bottom left. If you are Importing another WordPress website you would click on the Import button on the bottom right.
Most people who are reading this will most likely be starting new and therefore should be clicking on the Install button.
Step Four: Specifying the Settings:
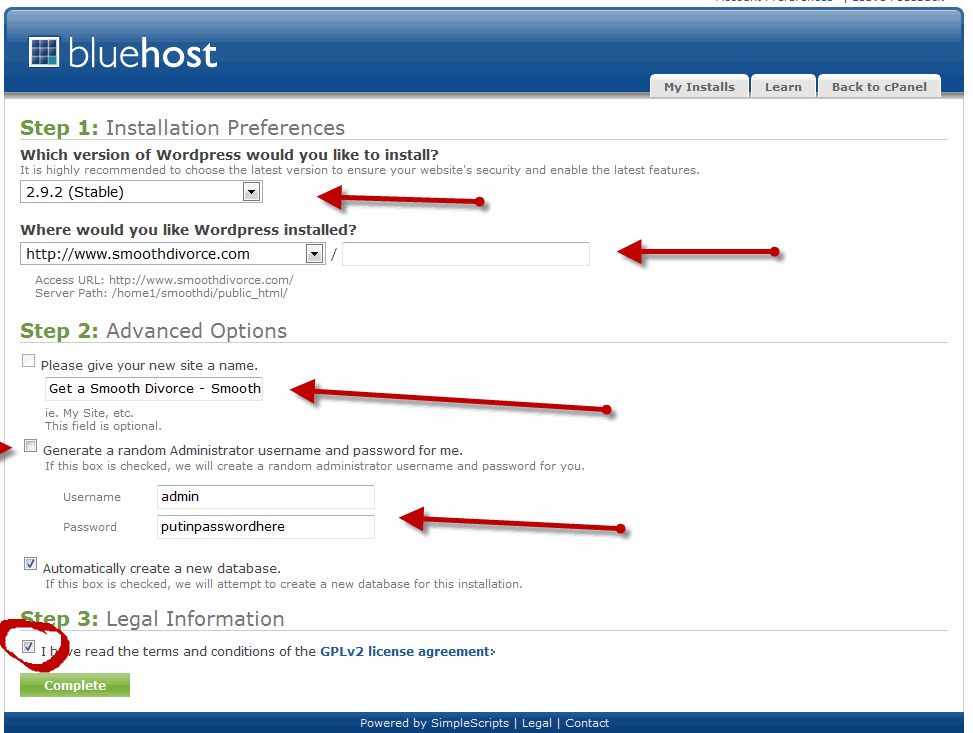
On this screen you will specify the settings for your WordPress website.
For version: You may want to choose the highest version that says “stable”. You can choose the version of WordPress you would like. The newest versions have the most up to date features and security. You should choose the most current version that is “stable”
For Where to install it: Choosing the choice as shown above will make your root domain name (like http://buildmysiteforfree.com/) the home page. Do not put anything in the box next to your domain address unless you want your home page to be a different page.
For Advanced Options: Give your site a name: Put in the name of your site here—don’t worry you can change it later.
Generate a random administrator name and password: uncheck this box and create a user name and password for access to your website. You will be working with your website from a different dashboard than your hosting control panel so it requires a different sign in.
Automatically create a database: this should be checked.
Finally make sure you check Step 3 to indicate that you agree with the legal terms of use of the software.
Now click “Complete” and your software will be automatically be installed.
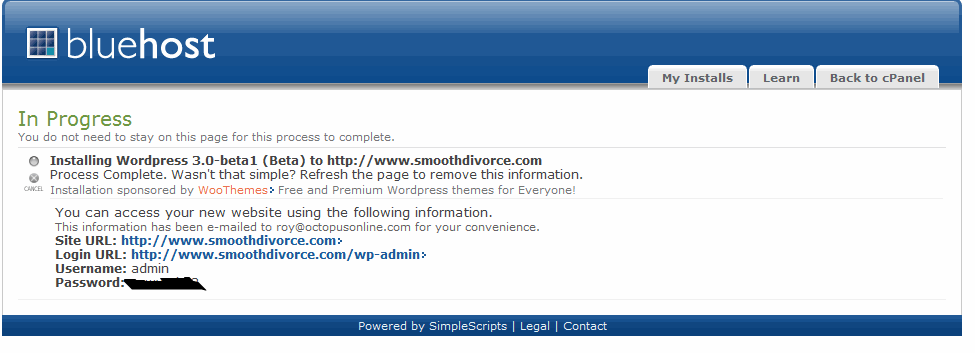
You will finally see the screen below indicating that your software was successfully installed.
You can now access your administration panel for your website at http://www.thedomainnameyouchose.com/wp-admin
Your website (unless you changed it on setup) will be at http://www.thedomainnameyouchose.com.
If you did NOT register your domain name at Bluehost which means you have your name registered at another registrar (ie: godaddy, network solutions etc.) you will need to change the nameserver information to resolve to Bluehost. You should have received an email from Bluehost explaining this.
Bluehost nameserver information is NS1.Bluehost.com and NS2.Bluehost.com


